

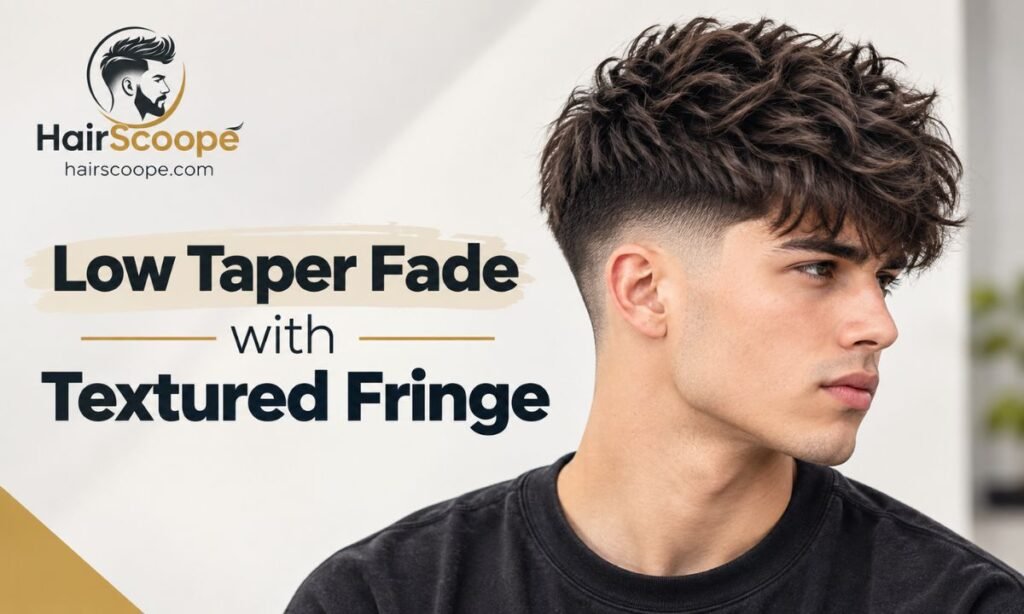
Some haircuts look great in the chair and fall apart by Tuesday. The low taper fade with a textured fringe doesn’t. The sides stay clean and quiet, and the top keeps its shape with about two minutes of effort.
That’s why barbers keep getting asked for it. It works in an office, at the gym and on a night out, and it doesn’t demand a strict routine to look intentional. Whether you’ve got straight hair that needs help holding shape, or curls that need room to move, there’s a version of this cut built for you.
This guide covers what the cut actually is, which version suits your hair and face shape, what to tell your barber so you get exactly what you pictured, and how to style it at home without wasting product.
What Is a Low Taper Fade with Textured Fringe?
It’s a two-part haircut. The sides and back are tapered short, and the hair on top is left longer, cut with choppy layers, and pushed forward into a fringe that sits over the forehead.
The word “low” matters. The taper starts close to the ears and neckline instead of climbing up the head the way a mid or high fade does. That keeps the transition soft, so there’s no hard line where short hair suddenly meets long hair. The result reads clean and deliberate, not severe.
The fringe is what separates this cut from a plain taper fade. Instead of combing the top back or to the side, the hair is layered so it falls forward naturally, with texture that gives it movement instead of sitting flat.
Here’s how the three main taper heights compare, since barbers use these terms constantly and it helps to know the difference before you sit down:
| Taper Height | Where It Starts | Contrast | Best For |
| Low | Just above the ear and nape | Subtle | Office, everyday wear |
| Mid | Around the temple | Balanced | Most guys, most hair types |
| High | Above the temple | Sharp | Bold, high-contrast looks |
If you’re weighing heights before your appointment, this breakdown of a mid taper fade with textured fringe shows how the same fringe looks with a slightly higher, sharper fade underneath it.
Why Choose a Low Taper Fade with Textured Fringe?
Three things make this cut worth asking for, and they’re the same three reasons it keeps showing up in barbershops season after season.
Modern and Versatile Look
The fringe gives you a relaxed, current shape without looking like you tried too hard. The tapered sides keep everything tidy underneath it, so you get contrast without the harshness of a skin fade.
Dress it up with a little matte paste and it reads polished enough for an interview. Leave it tousled after a workout and it reads casual. Same haircut, two completely different moods, depending on five minutes of styling.
Works With Different Hair Types
Straight, wavy, curly, thick or fine: a barber can adjust the layering on top to suit each one. Straight hair gets more texturizing so it doesn’t sit flat. Curly hair gets shape and weight control so it doesn’t puff out. Fine hair gets shorter, lighter layers that create the illusion of density.
This adaptability is a big part of why the style has spread so widely. It’s not one haircut that happens to suit a few people, it’s a template that barbers reshape around whatever you walked in with.
Suits Different Face Shapes
The fade slims the sides of your head, and the fringe softens your forehead. Changing the fringe length, direction, or volume lets you balance almost any face shape, whether you’re trying to add height, reduce width, or soften a strong jawline. The face shape section below breaks down exactly how to adjust it.
Best Textured Fringe With Low Taper Fade Styles
Here are 14 versions, from the simplest daily option to more distinctive, statement-making takes on the cut.
Classic Low Taper Textured Fringe
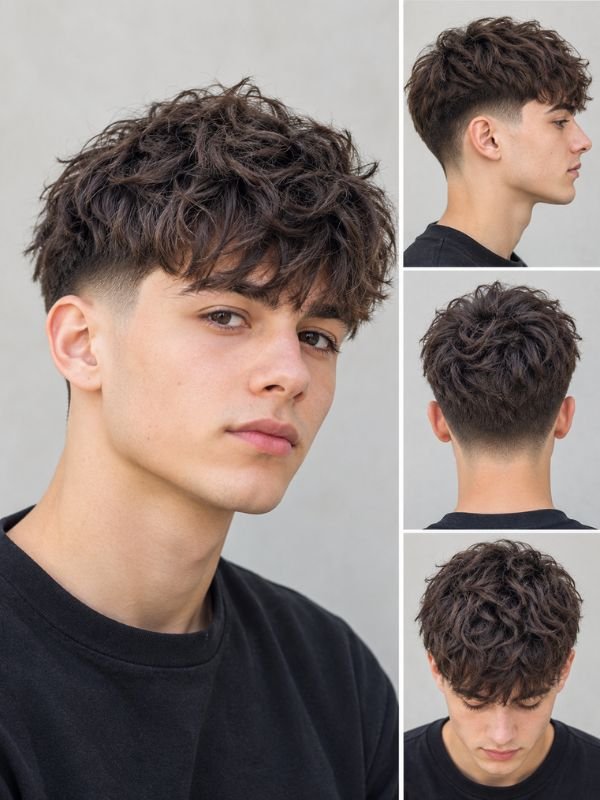
The default option, and the one most people picture when they hear the name. The sides taper cleanly, and the top is cut to about 2 to 3 inches with point-cut layers. The fringe sits just above the eyebrows. It’s the safest first-timer choice because it looks good with almost no styling effort.
Messy Textured Fringe
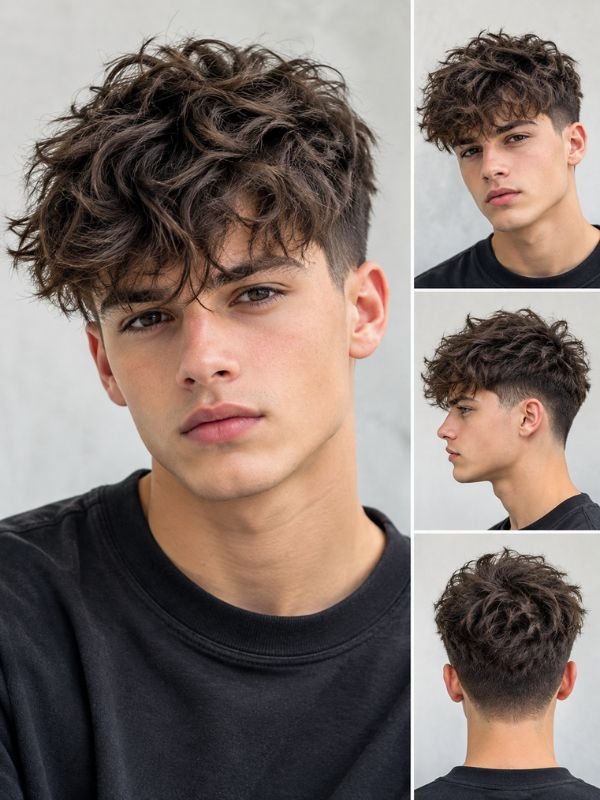
Loose, tousled and slightly undone, this version leans into imperfection on purpose. The layers are cut heavier so the hair falls forward without effort. Work in a little clay, rough it up with your fingers, and you’re done in under a minute. It suits medium to thick hair best, since thin hair can struggle to hold the tousled shape.
Side-Swept Textured Fringe
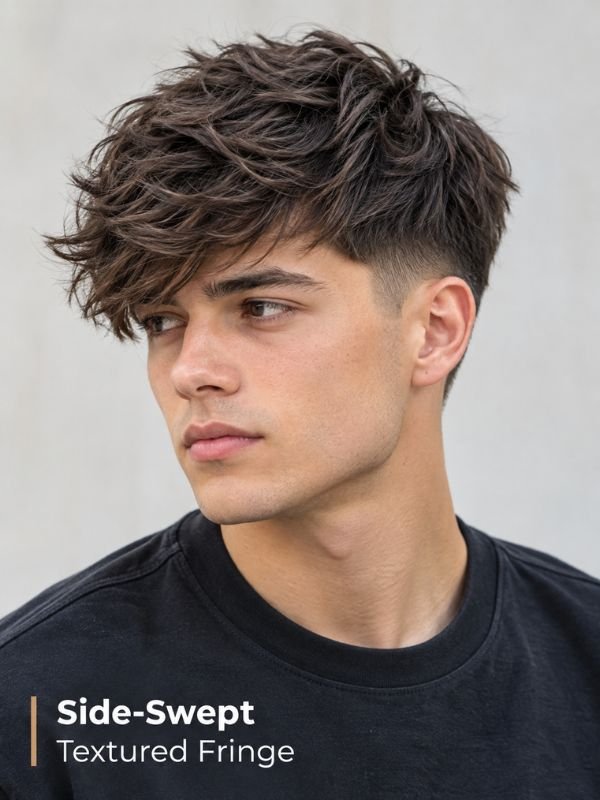
The fringe sweeps across the forehead instead of falling straight down. It adds a bit of polish and works well for work settings where a fully forward fringe might read too casual. A light-hold cream keeps the sweep in place without going stiff or shiny.
Choppy Textured Fringe
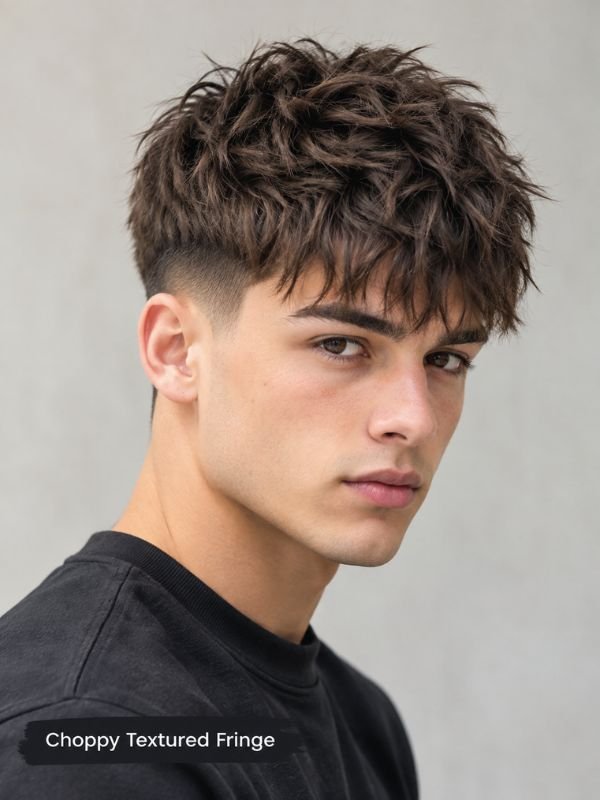
This one uses aggressive point-cutting or razor work to create separated, uneven pieces rather than one uniform layer. Each strand catches light differently, which gives the whole top visible texture even without product. It’s a strong choice for straight hair that would otherwise look flat and heavy.
Short Textured Fringe
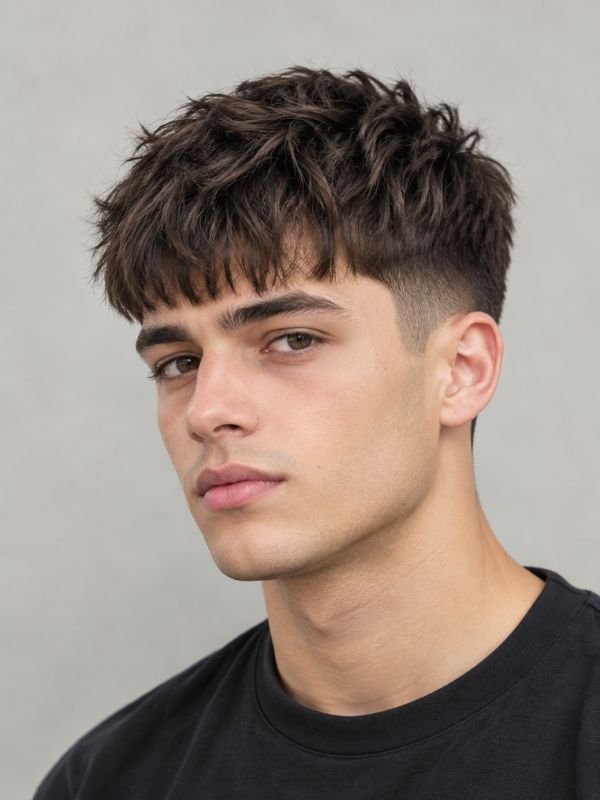
The top is kept around 1.5 to 2 inches, which is the lowest-effort version of the cut. It handles heat, humidity and gym sessions well, since there’s not enough length to flop or frizz. Fine hair tends to look best at this shorter length, where every strand pulls its weight.
Long Textured Fringe
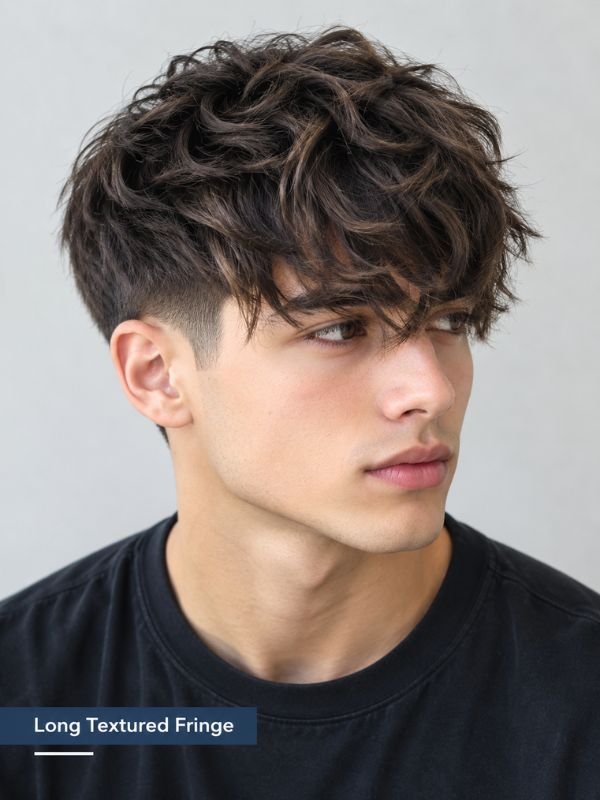
The fringe grows out to nose level or below, and the layers add movement rather than weight. You’ll need a bit more product to keep it controlled through the day. The tapered sides keep the overall shape from tipping into shaggy territory, which is the main risk with longer fringes.
Wavy Textured Fringe
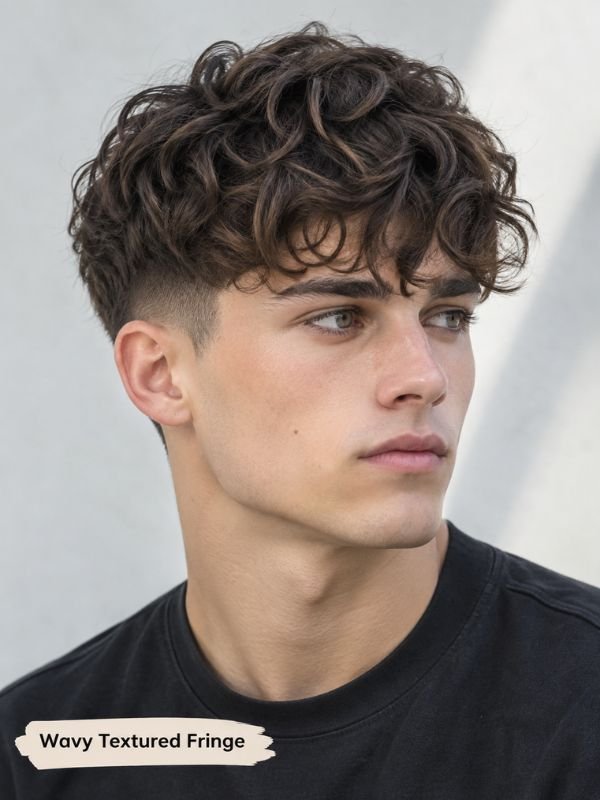
Natural waves do most of the styling work for you here. The barber removes weight so the waves don’t puff out into a triangle shape, then leaves enough length for the bend to actually show. A sea salt spray brings out the pattern and adds the slightly gritty texture waves photographed best with.
Curly Textured Fringe
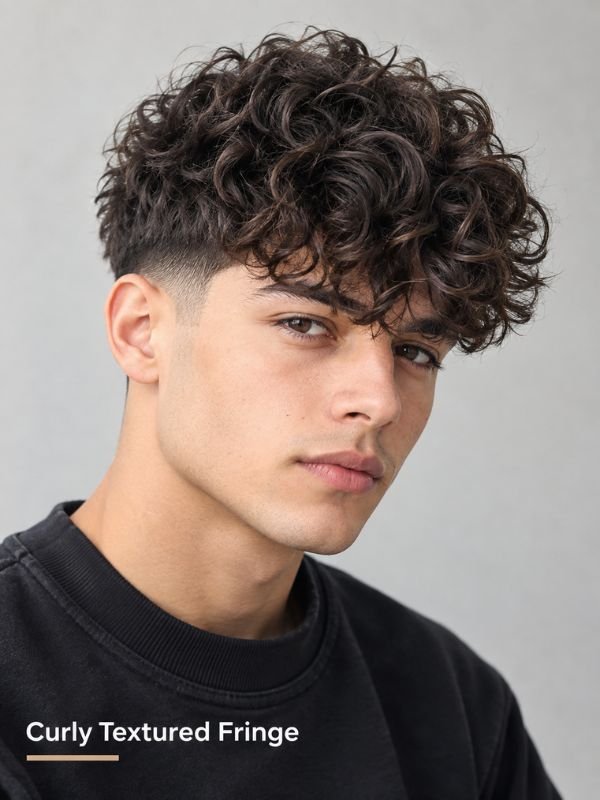
Curls sit on top with defined shape while the fade keeps the sides sharp and controlled. Your barber should cut curls dry, or at least check the shape dry, so the natural spring-back doesn’t surprise either of you once it’s finished. Use a curl cream and let it air-dry or diffuse rather than towel-drying, which can cause frizz.
French Crop Inspired Fringe
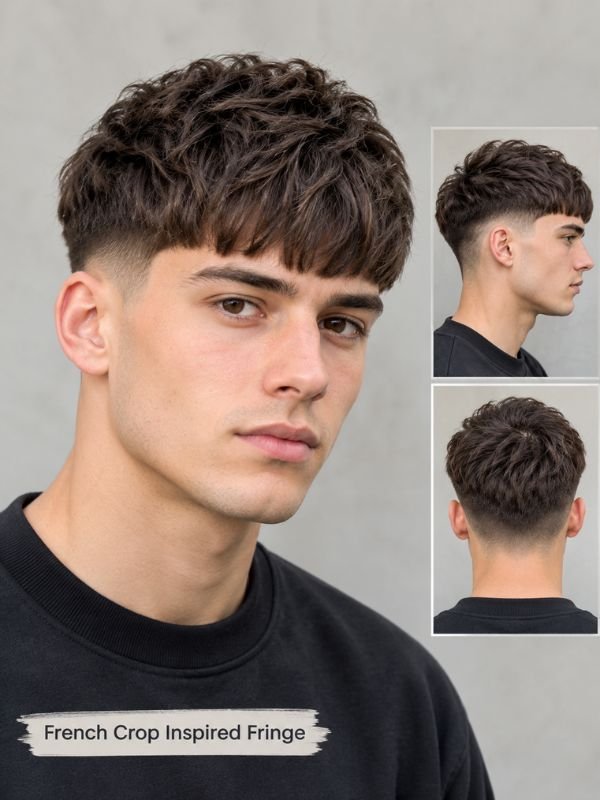
A shorter, blunter fringe that sits high on the forehead, paired with textured layers behind it. It’s compact, tidy and easy to maintain compared to longer fringe styles. If you like this look, this guide to a textured crop with a low taper fade covers several more variations built around the same short, structured shape.
Spiky Textured Fringe
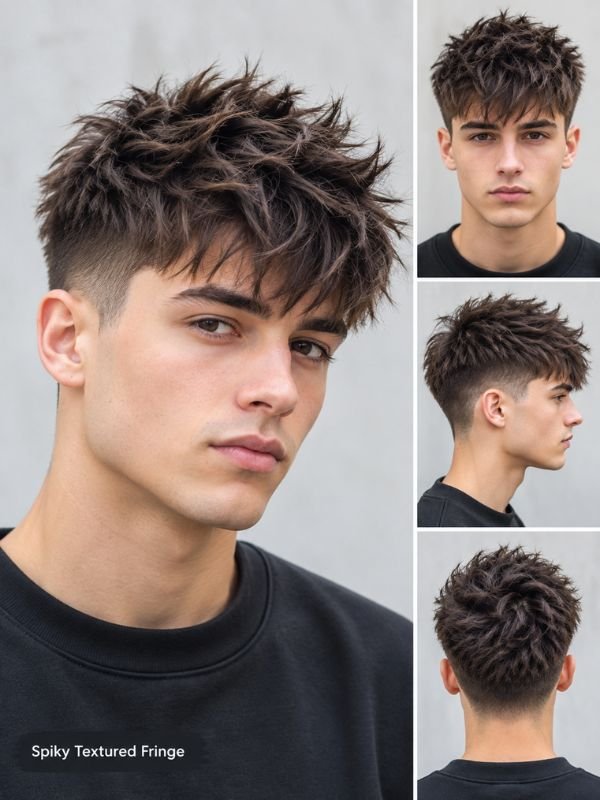
Layers are pushed up and forward with a strong-hold clay or paste, giving the front a lifted, energetic finish. It has a youthful feel that works especially well on shorter tops. Keep the spikes soft and separated rather than gelled stiff, or the style starts to look dated rather than deliberate.
Blunt Fringe with Low Taper Fade
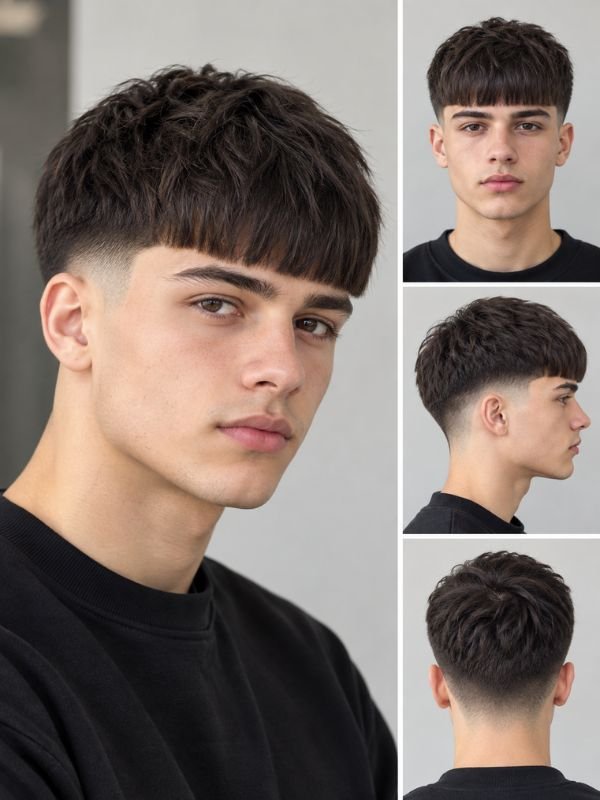
Here the fringe is cut in a straighter, more defined line across the forehead, with texture added only in the ends rather than throughout. It’s a stronger, more graphic shape than the messier options on this list. It works best on thick, straight hair that can hold a crisp line without collapsing.
Asian Textured Fringe Style
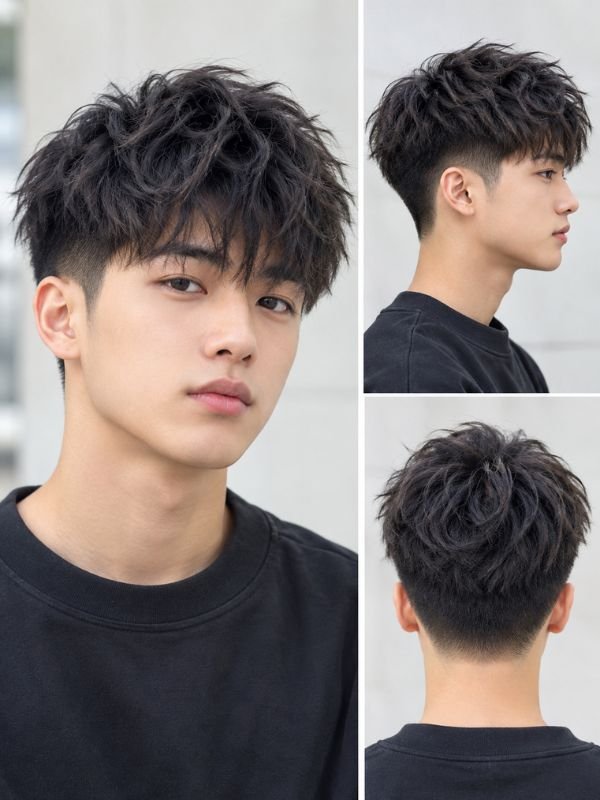
Asian hair tends to be straight and thick, so this version relies heavily on internal layering to cut weight and create movement rather than adding texture at the surface. The fringe usually falls softly over the forehead, often slightly longer than other versions to counter the hair’s tendency to sit flat. A low taper keeps the profile neat, and a light styling cream keeps the texture from going wispy by the end of the day.
Thick Fringe with Low Taper
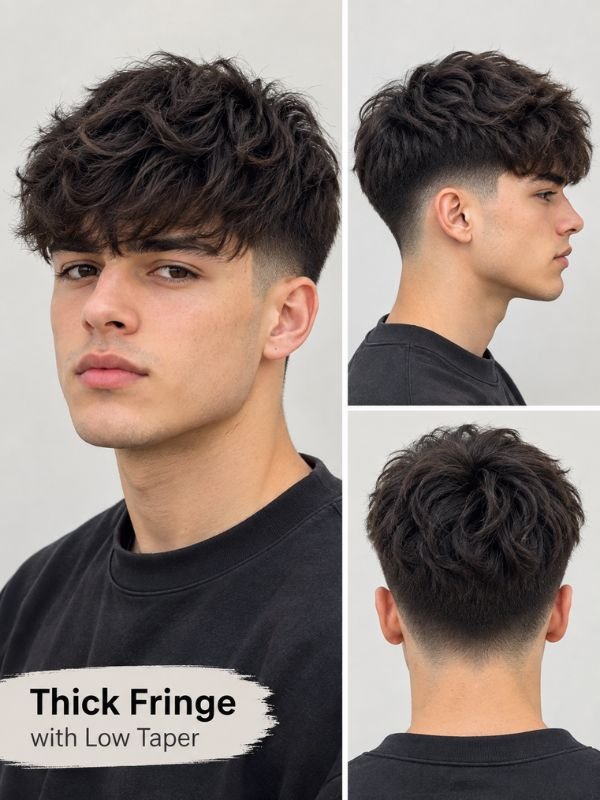
Made for guys with plenty of natural density. The barber keeps the fringe full and voluminous but thins out the interior so it doesn’t sit like a helmet on top of the head. Sea salt spray or a light clay is usually enough, since thick hair rarely needs much extra hold.
Textured Fringe Low Taper with Beard
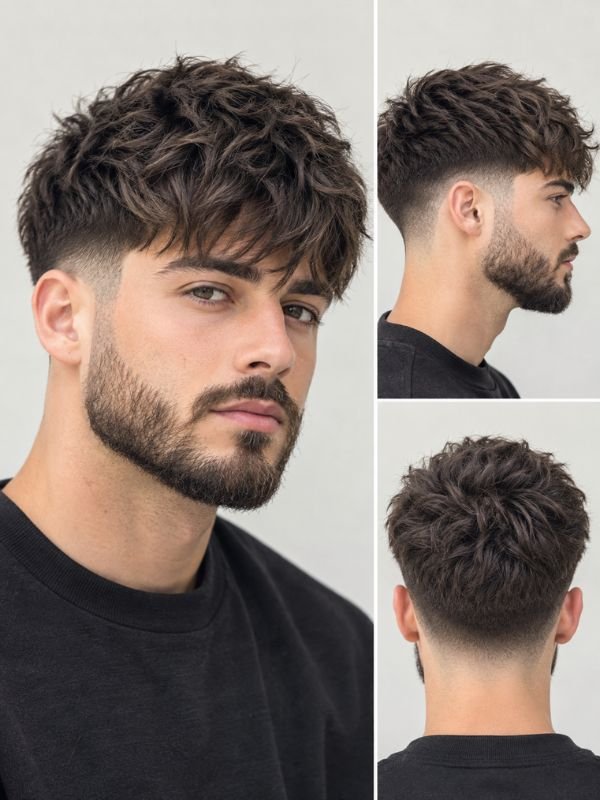
This pairs the fade with a beard, blending the taper into the beard line so there’s no visible break between the two. A trimmed beard with a soft fade at the cheeks looks intentional and finished, rather than like two separate grooming decisions. Tell your barber upfront that you’re pairing them, because the beard line will shape how the fade is mapped out.
Low Taper Fade Textured Fringe for Different Hair Types
Your hair type decides how the top should be cut and styled, more than any other single factor.
Straight Hair
Straight hair shows texture only if it’s actually cut in, since there’s no natural wave or curl to create movement on its own. Ask for point-cutting or razor texturizing rather than a blunt scissor cut. Without it, the fringe can lie flat against the forehead and look heavier than intended.
Wavy Hair
You’re in a good spot here, since the hair does some of the styling work for you. Keep some length so the waves have room to actually move and show their pattern. Ask your barber to thin the underside so the shape doesn’t balloon out as it dries.
Thick Hair
Thick hair needs weight removal to work with this cut. Ask for internal layers throughout, otherwise the fringe will sit in one bulky block instead of separating into pieces. Use a firmer product than you’d expect to hold the shape through a full day.
Fine or Thin Hair
Go shorter and lighter rather than trying to force volume with length. A shorter fringe with soft layers actually looks denser than a long, thin one that separates into visible gaps. Use a texture powder or volumizing spray instead of heavy pomades, which weigh fine hair down fast.
Curly Hair
Keep the top long enough to show curl definition, usually 3 inches or more measured from the root. Use a leave-in conditioner or curl cream, and avoid brushing dry curls, which breaks up the curl pattern and creates frizz. The taper underneath keeps the overall silhouette controlled even as the curls add volume up top.
Low Taper Fade Textured Fringe for Different Face Shapes
Oval Face
You can wear almost anything here, since oval proportions are already balanced. Try a classic or side-swept fringe, and don’t worry much about adjusting for symmetry.
Round Face
Add height rather than width. Keep the top slightly longer with some lift at the roots, and go easy on a straight-across fringe that can add unwanted width to the lower face. The tight, close sides of the taper help make the whole face read longer.
Square Face
A strong jaw pairs well with soft, loose texture on top. A messy or side-swept fringe softens the angles without hiding them, and the low taper keeps the sides balanced against a defined jawline.
Heart-Shaped Face
The forehead tends to be wider and the chin narrower on a heart-shaped face. A longer, side-swept fringe helps reduce visible forehead width. Avoid heavy volume on the sides, which can exaggerate the width imbalance further.
Oblong Face
Length is already present in an oblong face, so skip anything that adds extra height. A fuller, forward-falling fringe visually shortens the face. A blunt or thick fringe style tends to work especially well here.
How to Ask Your Barber for a Low Taper Fade Textured Fringe
Bring a photo if you can. It removes most of the guesswork and gets both of you looking at the same reference point. Then say these things clearly, since barber terminology varies more than you’d expect from shop to shop:
- The fade: “Low taper fade, starting just above the ear and nape.”
- The finish: “Blend it into the skin” or “leave a little length at the bottom.” Say which you prefer, since both are common.
- The top length: “About 2 to 3 inches on top, cut into a textured fringe.”
- The texture: “Point-cut or razor the layers so it’s choppy, not blunt.”
- The neckline: “Tapered” (natural) or “squared” (sharper). Tapered is the safer option if you’re planning to grow it out between visits.
Also mention how you actually style it day to day. If you use a hair dryer and product every morning, say so. If you never style it and just want something low-effort, say that too. Your barber will adjust the cutting angle to fit either routine.
How to Style a Low Taper Fade Textured Fringe
You need about five minutes, most of it spent drying rather than fussing with the product.
- Start with damp hair. Towel-dry until it’s not dripping, since fully wet hair holds product poorly.
- Apply a pre-styler. A little sea salt spray or volumizing mist adds grip before you start shaping anything.
- Blow-dry forward. Point the airflow toward your forehead and rough-dry with your fingers rather than a brush. Then lift the roots briefly for volume.
- Warm a small amount of product. Rub a pea-sized amount between your palms until it’s no longer visible as a blob.
- Work it through. Use your fingertips to pinch and separate sections of the fringe rather than raking through evenly. This is what creates the piecey texture.
- Set it. A short blast of cool air from the dryer locks the shape in place for the rest of the day.
Start with less product than you think you need. It’s much easier to add a little more than to wash out an overloaded fringe halfway through the morning.
Best Products for a Textured Fringe
Match the product to your hair type and the finish you’re after, since the wrong texture of product can undo a good haircut fast.
| Product | Finish | Best For |
| Matte clay | Natural, dry, strong hold | Thick or straight hair |
| Texture paste | Flexible, light shine | Most hair types |
| Sea salt spray | Beachy, gritty grip | Fine, wavy hair |
| Texture powder | Instant volume | Thin or fine hair |
| Curl cream | Soft, defined | Curly hair |
| Light pomade | Some shine, some hold | Side-swept styles |
Avoid heavy gels for this particular cut. They tend to make texture look stiff, wet and shiny, which works directly against the relaxed, lived-in look the fringe is meant to have.
Maintenance and Trim Schedule
Fades grow out faster than most people expect. Hair grows about half an inch per month on average, and the tightly tapered sides show that growth first, long before the top starts looking overgrown.
| Area | Trim Frequency | Why |
| Sides and neckline | Every 2 to 3 weeks | The fade blurs quickly |
| Fringe and top | Every 4 to 6 weeks | Keeps the shape and texture |
| Beard (if paired) | Every 2 weeks | Keeps the blend clean |
If you want to stretch the time between visits, ask for a slightly longer taper next time rather than a skin-tight one. A low taper without a full skin finish grows out more gracefully, so the loss of sharpness is more gradual. Wash your hair two or three times a week, and use conditioner on the length to keep the fringe soft and manageable between cuts.
Common Mistakes to Avoid
- Vague instructions. “Just a fade” can mean six different cuts depending on the barber, so be specific about height and finish.
- Cutting the fringe too short. You can’t add length back once it’s gone. Start longer and go shorter on your next visit if needed.
- Too much product. More product doesn’t mean more texture; it usually just makes hair heavy and greasy-looking.
- Skipping texturizing. A blunt, untextured fringe can end up looking closer to a bowl cut than a modern style.
- Ignoring your hair type. Fine hair with a heavy fringe, or curly hair cut with flat, blunt layers, rarely works the way it’s pictured.
- Waiting too long between trims. The taper turns fuzzy and loses its edge well before the top looks like it needs a cut.
- Blow-drying with a comb. A comb flattens the texture you’re trying to build. Use your fingers instead throughout the whole process.
Final Thoughts
The low taper fade with a textured fringe is popular for a simple reason: it looks good with very little daily work, and it adapts to almost any hair type or face shape you bring to the chair. Choose the fringe length and texture that suits your hair, be specific with your barber about height and finish, and keep up with regular trims so the taper doesn’t blur out between visits.
Save a reference photo, pick a product that actually matches your hair type, and give it a try. If the first cut isn’t quite right, small tweaks to the fringe length or the amount of texture usually get it there on the next visit.